Client Editor
Projector Web
You can now create and manage clients through Projector Web. See the Clients help page to learn more.
Manage the rates, billing information, and invoicing settings for your clients.
This form is reached from the Client Browser by double clicking on a search result or from the Select Client Form of the engagement info tab.
Permissions and Settings
To edit client information you must have the global permission Clients set to Update.
Info Tab
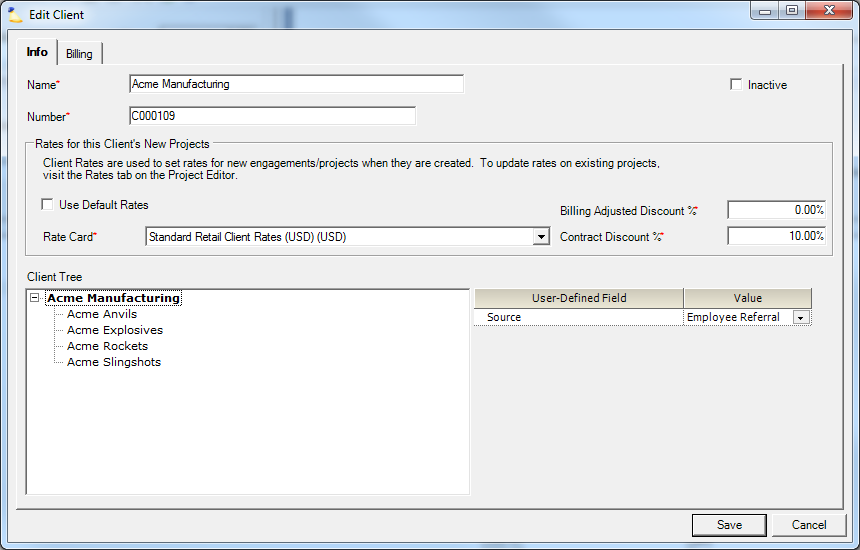
The info tab allows you to edit basic client information, contract rates, discounts, user defined fields and client levels.
General
See the table below for a description of these general client fields.

Control | Description |
|---|---|
Name | The client's name. |
Inactive | Check this box to make the client inactive. Inactive clients are unable to have new engagements or projects created for them in Projector. Reactivate a client at any time by unchecking the Inactive checkbox. |
Number | The client number. By default, Projector automatically generates client numbers. See Number Customization for more information. |
Rates
To learn more about rates please see the Managing Rates help page.

Control | Description |
|---|---|
| Use Default Rates | The default rate card is determined by an engagement's cost center. Tick the checkbox to use the default rate card. |
Rate Card | Use the dropdown box to choose your own rate card. Available rate cards can be reviewed from the Rate Card Editor. This dropdown box is only available if the Use Default Rates checkbox is unticked. |
Contract Discount % | The contract rates will be discounted by a default percentage. This can be a positive number, lowering rates, or a negative number, increasing rates. This field is only available if the Use Default Rates checkbox is unticked. Changes made to this field only affect newly created projects. Existing projects will continue to use existing values. |
Billing Adjusted Discount % | Enter this client's discount off contract rates. This can be a positive number, lowering rates, or a negative number, increasing rates. This field is only available if the Use Default Rates checkbox is unticked. Changes made to this field only affect newly created projects. Existing projects will continue to use existing values. |
Client Tree
This section only appears if there are two or more client levels specified in the System Settings General Tab.
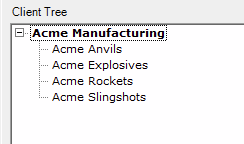
The client tree allows you to group clients in an hierarchical structure. A common scenario would be to have a top level corporation, then child levels of Division and Subdivision. A real world example would be a giant company like General Motors. GM has many divisions and you may do work for the automobile, aerospace and alternative energy divisions. Each of these may have subdivisions like engineering and quality assurance.
There are two main benefits to client trees. The first is that you can setup inheritance for rates, billing data and invoice settings. In the aforementioned GM example, this could mean that all your invoices go to GM and you don't need to set up duplicate addresses for each division. The second benefit is you can run reports on these client levels for data grouping purposes. In this way you can see how performance for subclients rolls up to the parent client.
If you find the Move or Make right click options grayed out, this is because you are right clicking on a client which is not actively being edited. Open the proper client and it will be shown in bold. Now right click will work.
Add Child
To add a child to an existing client, open the child. Right click on the child and choose Move this client to a different tree. Select the new parent.
Remove Child
To remove a child from a parent, open the child. Right click the child and choose Make this client a new top-level client.
Move Child
To move a child from one parent to another, open the child. Right click the child and choose Move this client to a different tree. In the popup window select the new parent.
Quick Switch
You can quickly switch between editing clients under a single tree by double clicking on any node.
User Defined Fields
Maintain UDF values in this section. Please see the User Defined Fields Editor documentation for more information on using UDF's. A typical client UDF might be Client Contact and Client Phone. You can pull this information into reports or invoices as needed.

Billing Tab
Specify the client's billing address, invoice information, how they should be invoiced, and optionally invoice email information. If this client is a child of an existing client level, then the inherit checkboxes are available. Ticking the checkbox causes the field to be populated with its parents value.

Billing Address
When an invoice is created, this is the address that is used.
Invoice Information
This information will be populated to the Engagement Billing Tab when new engagements are created for this client. The information from that tab will in turn be used to pre-populate the invoice editor when creating new invoices.
Billing Instructions | Specific billing instructions for this client. The person that prepares the client's invoice will see these instructions, but the client will not. |
Client Message | An optional message to be displayed on the client's invoice. This looks like an ordinary text box but can accept text in Rich Text Format (RTF). If you copy text from any "Rich Text Editor" e.g. Wordpad and paste it in the text box, the text will retain its formatting (bold, color, paragraphs, etc) Note: If the client message was created by copying from a rich text editor and pasting it into the Management Portal's Client Editor, saving edits to the client message on the web will remove the formatting. |
Payment Terms | Payment Terms define when payment of client invoices are due. They appear on printed invoices and in accounts receivables transactions sent to an accounting system. They dictate the time period in which an invoice must be paid and whether the organization is offering a monetary incentive for early payment. Choose from any of the options in this drop-down menu, or create additional options on the Payment Terms admin form. |
Invoice Template | The layout that will be used for this client's invoices. For example, you can select a template that shows billed time broken down by who submitted it or by which project it was submitted to. |
Billing Cycle | When creating new invoices, you can find invoices that need to be created based on the billing cycle. Choose from monthly, semi-monthly, weekly and current. |
Invoice for Time | Bill the client on either an hourly or daily basis. This option controls the availability of the Adjust for Daily Billing time card adjustment. It also affects the display of legacy templates to show days instead of hours in columns. This option does not apply when you have chosen one of our new templates. Because these new templates are editable, the expectation is that you will change the template to match your time display criteria. |
PO Number | New invoices for this client will automatically populate with the specified PO Number |
Create an Invoice for Each
When creating an invoice, Projector groups like time cards, cost cards, and milestones together. Here you define how you want that grouping to occur.
Time and cost together/separately | Do you want to group time and cost cards together on the same invoice? Some clients pay labor invoices more quickly than expense invoices or vice-versa. Billing for time/expenses separately may help your organization get paid faster. Milestones are not mentioned in this dropdown, but they are affected by your choice. "Together" really means Time + Cost + Milestones all on the same invoice if possible. When would it not be possible? Milestones optionally have a project. If you are invoicing time and cost at the project level, but the milestone doesn't have a project, we can't stick them together. Rather, a separate invoice will be created for just the milestone. The invoice will be at the engagement level. If you choose the "separately" option then separate invoices are created for time, cost and milestones. |
Client* | Create an invoice for all engagements under this client. If there were five engagements then all billable items would be brought onto a single invoice. |
PO Number* | Create an invoice for all engagements with matching PO numbers. If you have three engagements with the same PO number, all billable items are brought onto a single invoice for all three. |
Engagement | Create a separate invoice for each individual engagement. |
Project | Create a separate invoice for each individual project. If you are using milestones with this selection, it is a good idea to make sure that milestone is associated with a project. If the milestone is not associated with a project, we'll create a separate invoice for it at the engagement level instead. It is not always possible to group all engagements together at the Client or PO level. This occurs when engagements have a difference in one or all of the following:
|
* Special Note | |
| Include receipts when creating PDF invoices | Display receipts when this invoice is saved or mailed as PDF? |
| Apply available balance to invoice amount upon invoice creation | If a prepayment balance exists, automatically apply as much of the balance as possible to the current invoice. |
Tax Types
Tax types follow an hierarchy in Projector. By default, taxes are defined at the company level. When you create an invoice we look at the engagement company and apply these default taxes. However, you may have some clients that are taxed in a special way. For example, when levying a local sales tax. When this occurs, you'll likely want to come here and add the special local tax to the client. If you need even more granularity, you can also set taxes on a per engagement or per invoice basis.
To edit your available tax types, see the Tax Type Editor.
Projector only allows up to three tax types. If you have more than three taxes to levy, you'll need to combine two of them into a single line item.
| Tax | Description |
|---|---|
| Tax Type 1 | |
| Tax Type 2 | |
| Tax Type 3 |
Email Settings
When invoices for this client are issued, have them emailed also. See the Invoice Editor MP - Distribution Tab for more information.
E-mail and | Tick the checkbox to enable emails. Then specify the radio button for how you would like the invoice attached.
|
Send e-mails from | Search for a user in your installation who emails will be sent from. Only registered emails will work. See How do I email my invoices? for more information on registering emails. |
Send e-mails to | Specify who should receive your emails by adding users to the To, CC, and BCC fields. |
Using e-mail template | The email template should correspond to the radio button you chose under the E-mail and section. For example, if you chose to include the invoice as an attachment, your email might read, "Please find your invoice attached to this email." |