How to make a billable project non-billable and vice versa
One day you are looking at your engagements, and suddenly realize you accidentally created an engagement of the wrong type. You have put a lot of work into defining all the engagement parameters and subprojects. On top of that, your resources have started submitting time. Projector won't let you change the engagement type between billable and non-billable. What are you going to do? This help document guides you through the fastest possible fix.
Before we get into that, why the limitation in Projector? There are two important reasons. First, in order to maintain proper audit trails for your accountants, we don't allow engagements to be switched on/off for billing. This would make it too easy to game the system. Instead, by forcing you to transfer any existing work to another engagement, a proper audit trail is established. In addition, Projector may charge you differently for users based on whether an engagement is billable or non-billable.
Solution
The solution is relatively straightforward. You will follow these steps.
- Clone an existing project on the bad engagement into a new engagement of the correct billable/non-billable type
- If there are any additional projects, clone those ones into your new engagement
- Remove any time and cost cards that are on invoices
- For each project on the bad engagement, transfer them to the corrected engagement
- Close out the incorrect engagement
Clone into a new engagement
The first step in our correction is to create a new engagement of the correct billable/non-billable type.
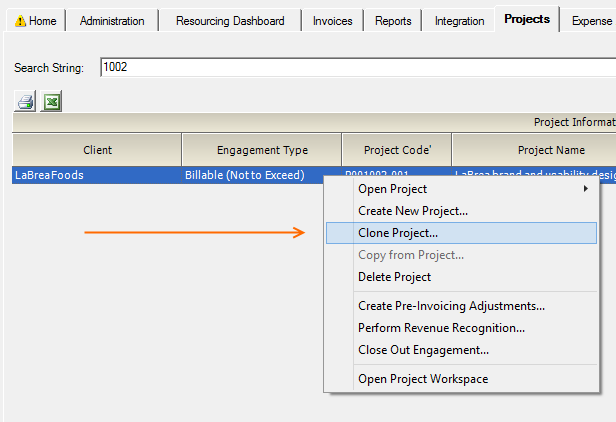
- Go to your Projects tab
- Find a project on the bad engagement
- Right click it and choose Clone Project
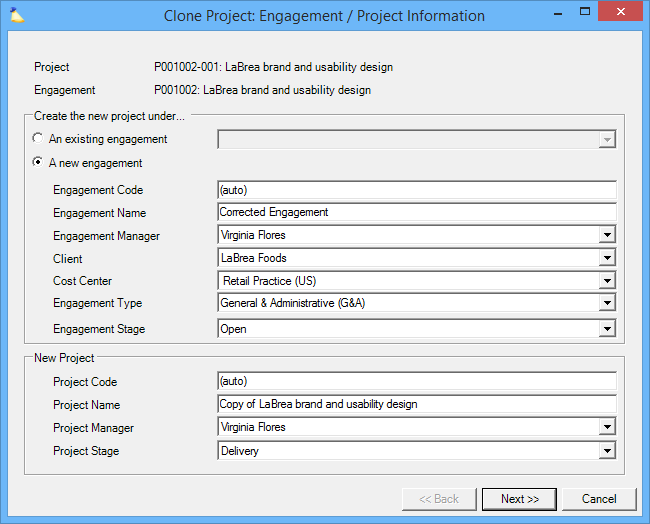
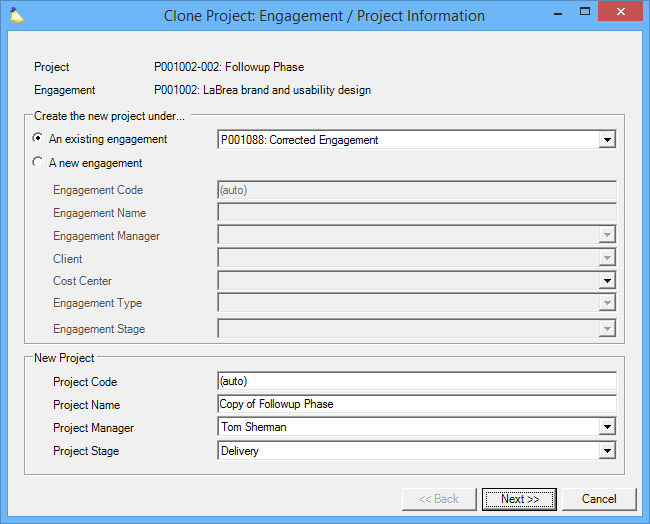
On the clone project screen you must make sure you pick a new engagement.
- Choose A new engagement
- Choose an Engagement Type that matches the billing status you want (billable or non-billable)
- You may need to update the Cost Center depending on how you organize your engagements
- Make any other changes you want, but probably most other fields can stay the same
- Click Next
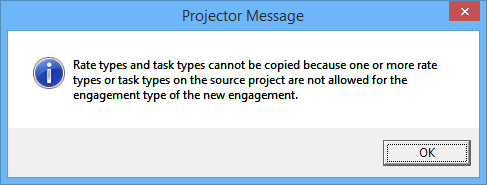
You will see the following message if you go from Billable to Non-Billable. It can be safely ignored.
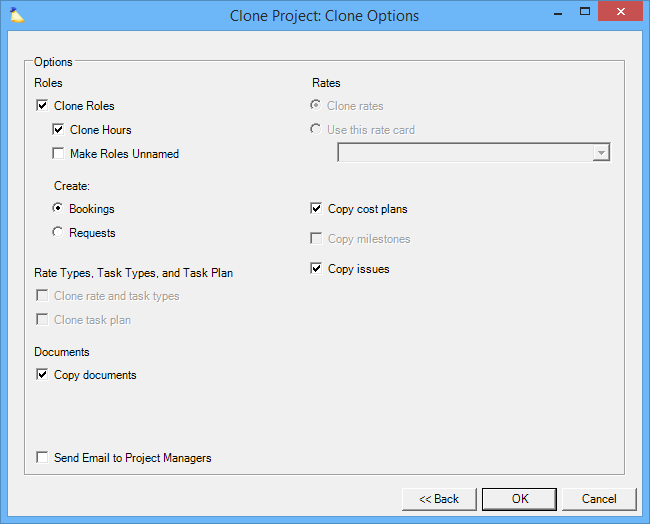
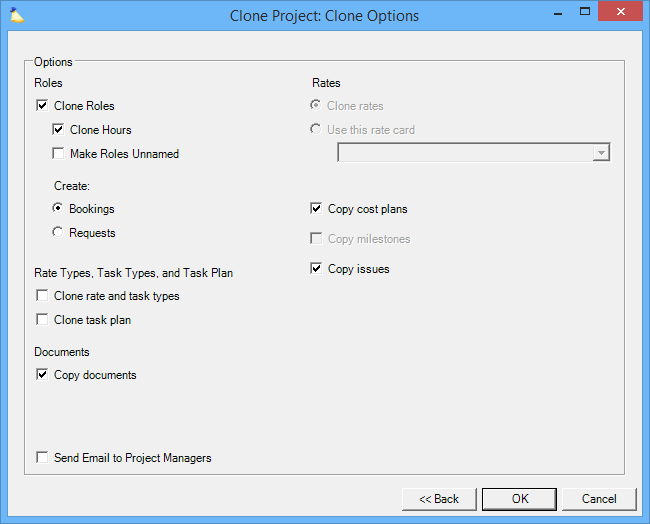
This next screen is where you can save a lot of time. It allows you to copy over most of the settings from your original project to your new one.
- Make sure you have the Clone Roles checkbox ticked. This greatly facilitates transferring time/cost to the new engagement
- Tick Clone Hours. This clones all scheduled hours into the new engagement
- UNtick Make Roles Unnamed
- You'll probably want Bookings to be cloned
- Tick Copy Documents
- Tick Copy cost plans
- Tick Copy issues
- Click OK
Now you have a new engagement of the correct billable/non-billable setup
Clone additional projects
If the old engagement had multiple projects on it, you'll need to clone each one of those INTO the new, corrected engagement. To do so, follow pretty much the same steps as above.
- Go to the project browser
- Find project -002, etc
- Right click the project and choose Clone Project
This time we are cloning into the new, corrected engagement.
- Choose An existing engagement
- Click Next
Use the same settings you did the first time around
- Make sure you have the Clone Roles checkbox ticked. This greatly facilitates transferring time/cost to the new engagement
- Tick Clone Hours. This clones all scheduled hours into the new engagement
- UNtick Make Roles Unnamed
- You'll probably want Bookings to be cloned
- Tick Copy Documents
- Tick Copy cost plans
- Tick Copy issues
- Click OK
Remove time and cost cards from invoices
You can skip this step if you are going from non-billable to billable. It is impossible for non-billable cards to be on an invoice. Going the other way around, you'll need to pull the cards off invoices anyways since you can't bill for non-billable engagements. Technically you could do the transfers directly from the invoice editor, but doing this outside invoices is likely faster.
- Find time AND cost cards that are on invoices for this engagement
- Exclude them from the invoice
Transfer time cards to new engagement
Next we'll transfer all the time cards from the old engagement to the new one.
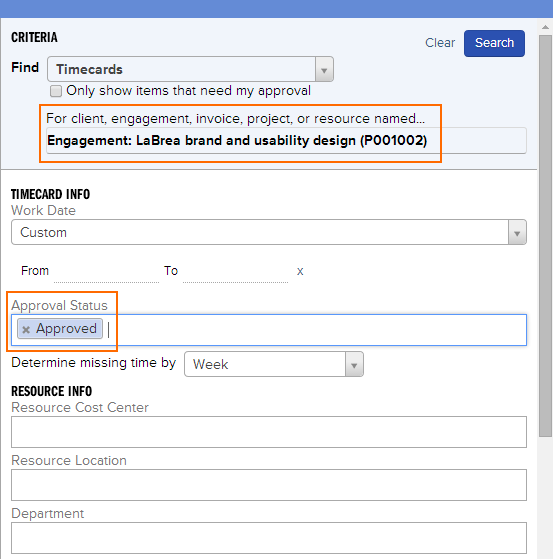
- Go to Manage Time in Projector Web at https://app.projectorpsa.com/management/time
- Find all time cards against each project under the old engagement
- UNtick the Only show items that need my approval checkbox
- Enter the old engagement's code or name in the search field
- Clear the date range by clicking the X
- Search for Approved cards
On the results screen you'll find all the time cards.
- Group them by Engagement
- Click on the results set to get to the time card details

Finally we'll transfer them over
- Choose Select All
- Click Adjustments
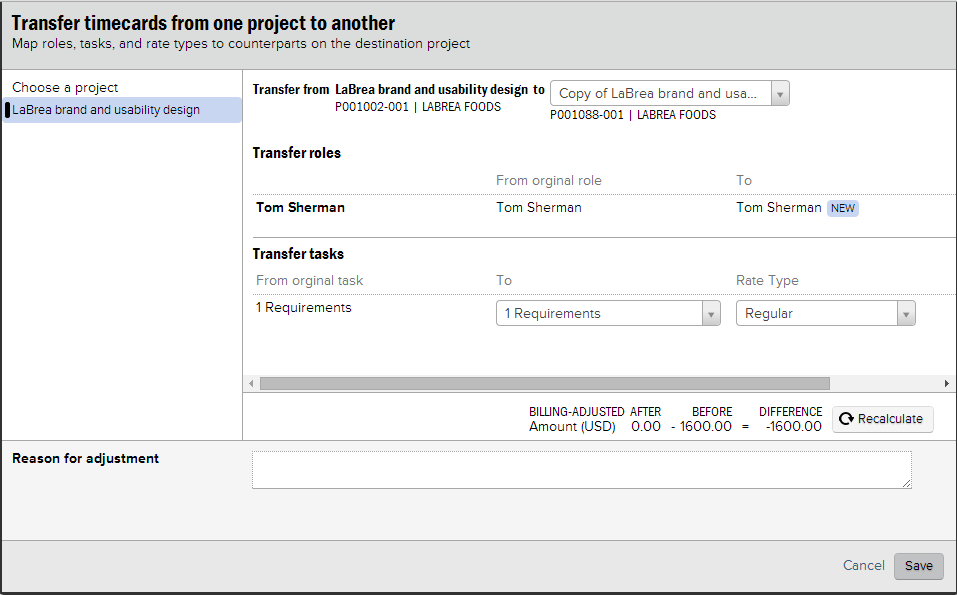
- Click Transfer Project/Role
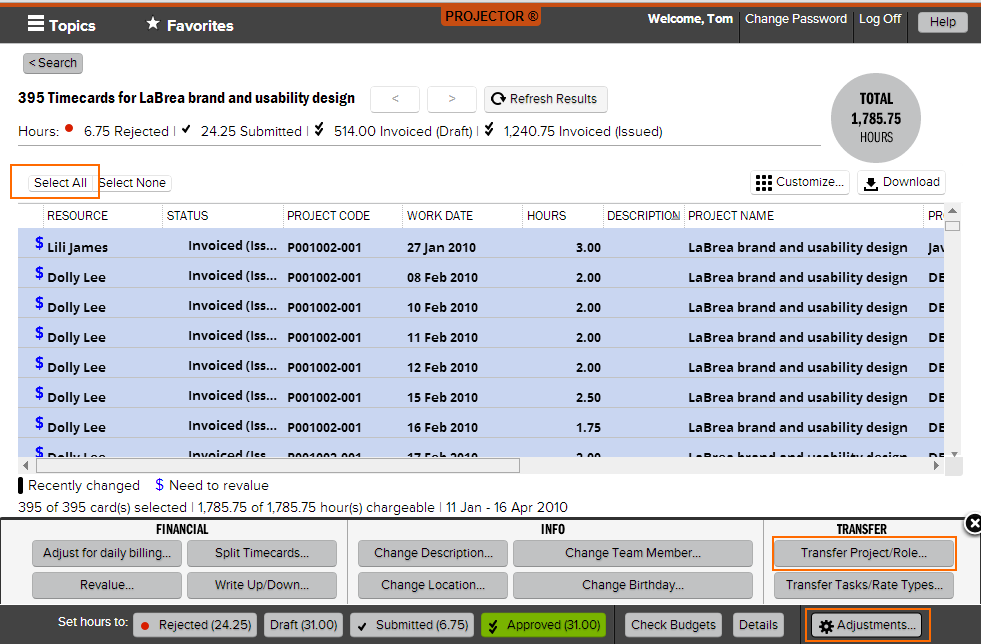
- Choose the new engagement as the "to" option
- Everything else should be able to stay the same since the clone procedure created exact targets from the old engagement
- You may receive an error about cards that have been through revenue recognition at this point. If so, you'll need to reverse revenue recognition before you can proceed.
- Close the old engagement for time entry. When resources try and submit their time, they will receive an error about the project being closed. Each resource then needs to manually move time to the new project.
- Temporarily set the cards to approved yourself, transfer them, and then set them back to draft or rejected. I'd probably go with this method as it can be accomplished relatively quickly and will be generally transparent to your end users. These steps are basically the same as the one we just did, so I won't run through the screenshots a second time, just the steps.
- Run the same time card query we used earlier, but search for Draft instead of Approved
- View the time card details
- Select All and switch to Approved
- Transfer the timecards to the new project
- Set the timecards back to Draft
- Repeat these steps, but do it for Rejected instead
Transfer cost cards to new engagement
For this portion of the program we'll need to move back to the management portal. Here you'll use the pre-invoicing adjustments screen to move all approved cost cards over to the new project.
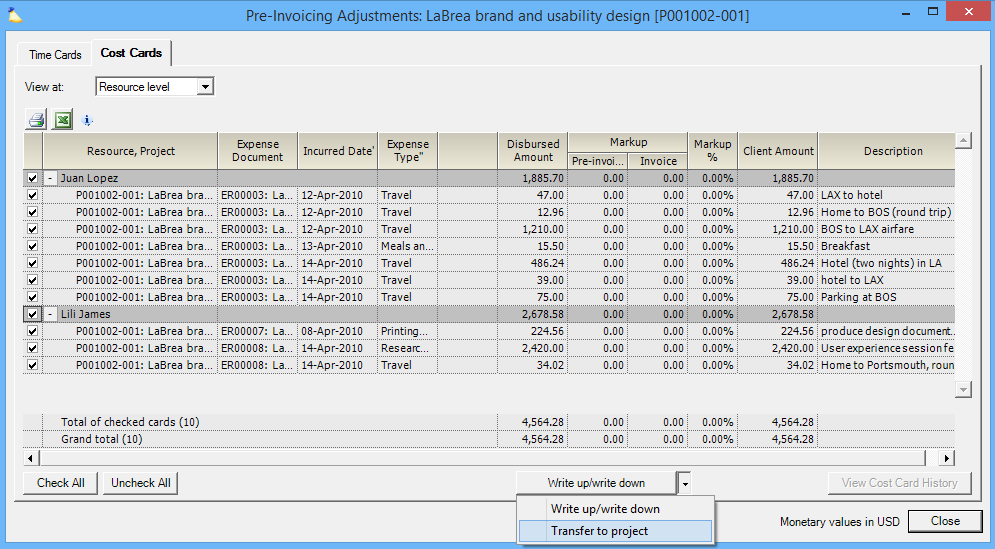
- For each project under the old engagement, right click on it and choose Create Pre-Invoicing Adjustments
- On the Cost Card subtab select all cards
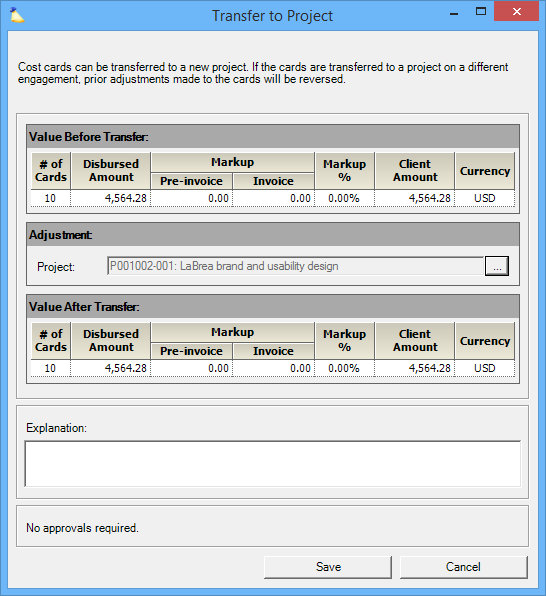
- Choose Transfer to Project from the write up/down screen
From here all you need to do is click OK to complete the transfer.
As with time cards, there could be draft or rejected expenses sitting on the projects. You should run a cost card listing report and identify these cards. Then either notify resources to transfer the expenses themselves, or do it for them through the expense entry screen.
Close out the old engagement
Now that everything has been cleaned up, it is time to close out the old engagement.
- Edit the engagement
- Set the stage to Closed or whatever your equivalent of Closed is. It is likely that this forces all sub-projects to a closed stage too, but