Invoice Editor MP - Distribution Tab
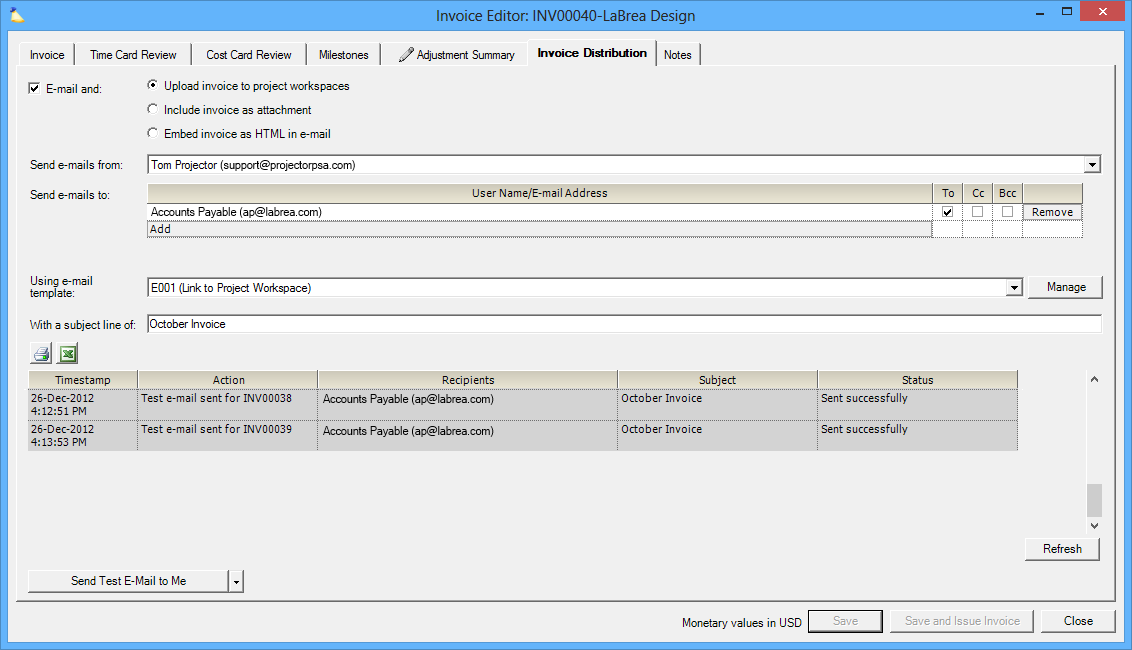
The Invoice Distribution tab allows you to notify your clients by email when they have an invoice. Invoices can be attached to the email, appended to the end of the email, or uploaded to Projector's servers so that they are accessible over the web. For more information on enabling this feature, please see How do I email my invoices?
The Topic of the Day: Invoicing webinar is a great resource to learn all about creating invoices on Projector Management Portal.
Permissions and Settings
To email invoices you must have the Invoice Distribution module enabled.
In order to send emails on behalf of your organization, you must designate an email address for that purpose. We recommend using a generic name like AR@mycompany.com and having it forwarded to your finance department. To add, edit, or remove email allowed email addresses, please contact the Projector support team.
The "sender" email address must belong to an active user and most often you will want to flag them as a "client user." When selecting a client user, you'll need to specify the client associated with that account. You should have a "self" client named after your company. Choose that client..
Controls
These controls can be modified, but not saved once an invoice has been issued. This is to keep a permanent record of your settings at the time of issue. If you need to permanently make a change then you must first void, make the changes, and then reissue the invoice.
Control | Description |
|---|---|
E-mail and | Tick the checkbox to perform the selected option when the invoice is issued.
|
Send e-mails from | This field autopopulates based on the client being billed. You can choose a different user from the dropdown list. This is the address that will appear in the From field when your client receives the email. This is also the address that any replies will go to. Adding or removing addresses from this dropdown needs to be done through the Projector support desk. |
Send e-mails to | This list autopopulates based on the client being billed. You can manually add additional users to this list, but typically you would want to use the client editor to do so. |
Using e-mail template | This field autopopulates based on the client being billed. You can manually override this to a different template. The email template should correspond to the radio button you chose under the E-mail and section. For example, if you chose to include the invoice as an attachment, your email might read, "Please find your invoice attached to this email." |
Manage | Opens up the email template manager window. |
With a subject line of | The default subject line is the invoice's name. You also have the option to change the default subject line to the invoice number. This default setting, called Invoice Email Subject Format is modified in the Account Settings Editor. You can manually override the subject line by typing in a new one, but you can't set a default subject line other than by virtue of the fact that invoice names and numbers can also be customized in the Account Settings Editor. |
Grid
The grid shows a history of every email sent for this invoice.
Column | Description |
|---|---|
Timestamp | The time that the email was sent in your local timezone. If somebody else sent the email from a different time zone, then it is localized to your location. |
Action | The following actions are possible:
|
Recipients | Who the email was sent to. |
Subject | The subject line of the sent email. Note: The account setting is only used when actually sending the email. It has two placeholders, {0} and {1}, both of which are optional. {0} is substituted with the invoice email subject text (e.g. the invoice name) if it appears and {1} with the invoice number if it exists. |
Status | The current status of the email according to Projector's mail servers.
The status messages do not and cannot determine whether the email was successfully received by the end user. The status can only indicate whether the email was successfully deployed. Any responses from the target email (mailbox full, address not found, etc) will appear as bouncebacks directly to your From address. |
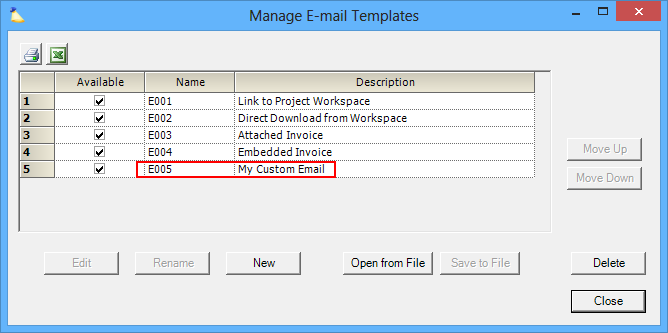
Email Template Manager
Customize the email that will go out to your clients. By default Projector includes the following four templates. The chosen template needs to match the Email and... action. For example, if your email says the invoice is attached - then make sure you choose the Include invoice as attachment option. As it can be easy to forget to do this matching, we recommend that you set these settings via the Client Editor. Then new invoices will autopopulate with the correct values.
When embedding images in your email templates, you must choose specific settings or the images will be stripped by most email clients. We have tested Gmail and Outlook 2007+. Other mail clients may vary in their handling of embedded images, but it is likely safe to say that if it works for those major players, it will work for most other clients. You'll want to choose PictureBox sizing options of Zoom or Stretch. In addition, the embedded image must be either PNG or JPEG. Embedded images won't scale, despite the preview looking correct. So make sure your image is the correct number of pixels prior to embedding.
Default Templates | Description | Screenshot (click to zoom) |
|---|---|---|
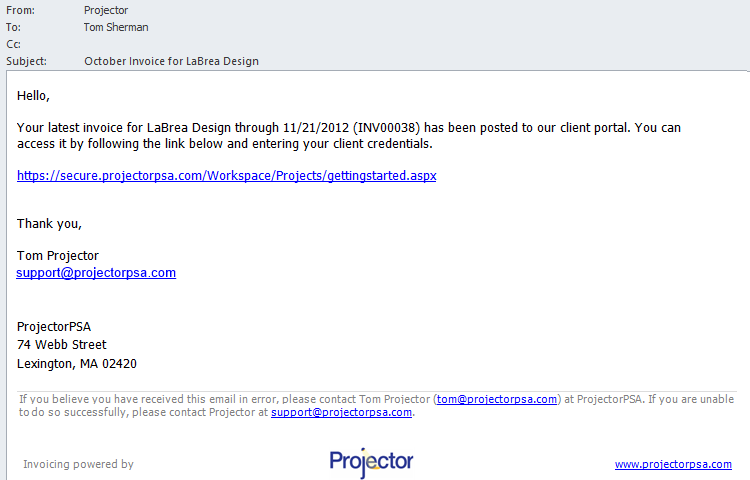
E001 | Contains a link to your project workspace. You clients can log in and view the current as well as past invoices. |
|
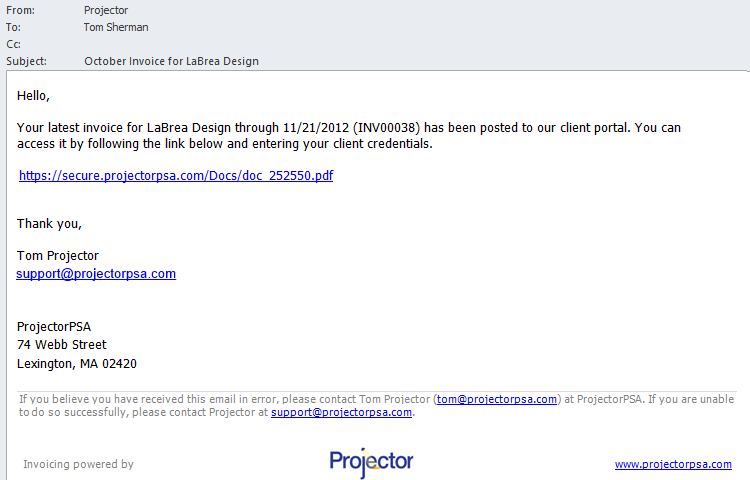
E002 | Contains a link to the invoice. After your client logs in, the invoice will immediately download. |
|
E003 | The invoice is included as an attachment to the email. |
|
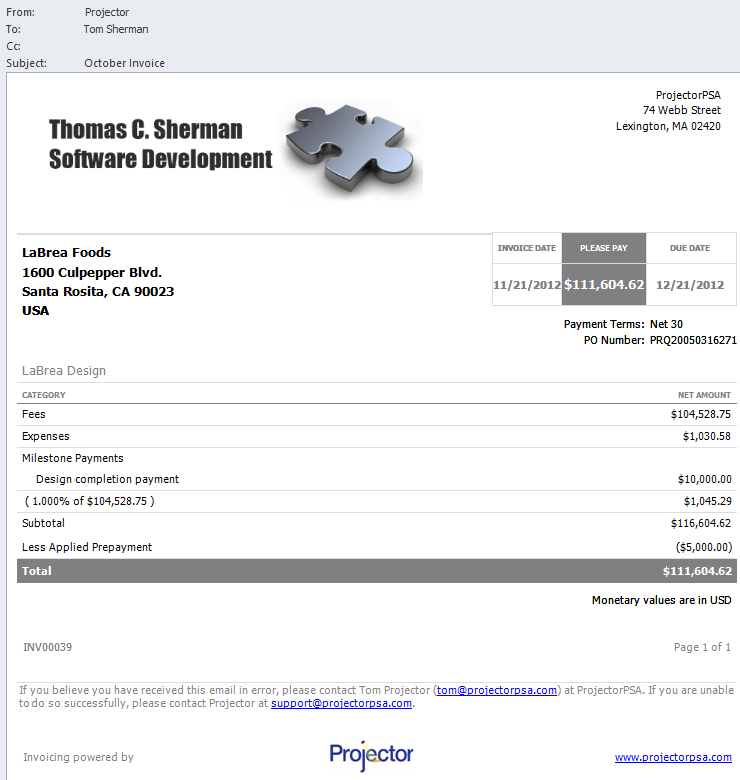
E004 | The invoice is rendered as the actual body of the email. |
|

Customize Your Email
You can customize the email that is sent to your clients. Clicking on Manage brings up the email template manager. From here you can launch a full featured editor. For an introduction to using this editor, please see the Template Editor.
Permissions and Settings
You must have the global permission E-mail Templates set to view or update to access the manager.
Grid Columns
Column | Description |
|---|---|
Available | Controls whether users can select this template for preview or to issue an invoice. For invoices that are already issued the template at time of issue is locked in. Even if you make the template unavailable the issued template will remain associated with the invoice. |
Name | A short name that will appear in the template dropdown list. Your installation may have preinstalled templates that use the naming convention E001, E002. |
Description | A description of the template. When a user browses available templates they will see this description. |
Template Manager Controls
Control | Description |
|---|---|
Move Up / Move Down | Set the order that each templates appear in dropdown lists |
Edit | Click on an existing template's row and click edit to modify it using the Template Editor |
Rename | Click on an existing template's row and click rename to give it a new name or description |
New | Opens the Template Editor with a new, empty template |
Create a New Template
To create a brand new, empty template, click New from the template manager. Then click Save or Save As from the template editor.
To create a new template based on an existing template
- Select the existing templates row in the template manager
- Click Edit. The existing template opens in the editor.
- In the template editor choose File | Save As
The following dialog will be displayed. See the* Name*, Description and Available flags described above.

Modify an Existing Template
- Select the existing template in the template manager
- Click Edit. The existing template opens in the editor
- Make your changes
- Click File | Save
Base New Template on Existing Template
- Select the existing template from the manager
- Click Edit
- Choose File -> Save As from the menu.
- Give the new template a name and description
- Close the editor
- Find the new template in the list and choose Edit.
Email Customization Fields
When customizing your templates, the following fields are specifically included for emails.
Field | Description |
|---|---|
SenderName | The From user's display name |
SenderEmail | The From user's email address |
InvoiceURL | A link to your project workspaces where historical and current invoices can be viewed/downloaded. The link takes you to the front page of the project workspaces. You will then need to find the project for this invoice and click the invoices tab. Which link you are taken to is dependent on your installation settings.
|
WorkspaceURL | A direct link to the downloadable invoice. After logging in the invoice will begin to download immediately. |
Email Images
When including images in your templates, there are several scaling options available. If you include these images in your email body, then two caveats must be kept in mind.
- Only Stretch and Zoom scaling options allow images to be embedded in the email body
- When embedding images, they will display full size. They will not be scaled. So make sure your images are the proper size/resolution for the email.
Email Footers
In order to be in compliance with United States CAN-SPAM laws, a footer is automatically added to the end of your emails. This footer contains unsubscribe information.
