QuickBooks Synchronize Wizard
This form is used for transmitting data between Projector and Quickbooks. Three different types of data can be sent - accounting data, clients, and vendors. Accounting data is sent one way from Projector to QuickBooks, with Projector acting as an accounting sub-ledger. Clients and vendors can be cross-synced. This page shows you how to start a sync and push data for each of these types.
This form is reached by going to the Integration tab | QuickBooks subsection | Accounting Synchronization and clicking the Synchronize Accounting button.
Permissions and Settings
Before you can proceed you need the following:
- The QuickBooks module enabled
- Your installation is connected to QuickBooks (Desktop Edition or Online Edition)
- Your user has the global permission Accounting System Interface set to Update
Start a Sync
Follow these steps to open the synchronization wizard.
- Go to your Integration tab | QuickBooks subsection | Choose Desktop Edition or Online Edition
- Choose the company you wish to send transactions for
- If you are using QuickBooks Desktop Edition, make sure the company file is open
- Click Synchronize Wizard
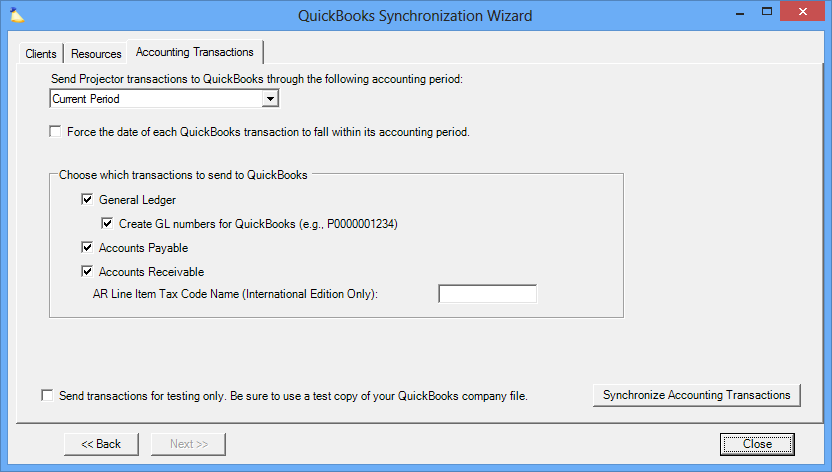
Once you start a sync, there are three tabs. They sync Clients, Resources, and Accounting Transactions respectively. Visit these help pages to learn more.