Resource Editor
Resources are people who need to report time, report expenses, or be scheduled on a project. From here you can create, edit, delete, and mark resources inactive. You can also manage their resource profiles by defining contact information, working schedules, skills, time off, and many other aspects of individual resources. Projector maintains a time phased history log of the resource as they grow in your organization. Some of the things you can see are title changes, department changes, when contractors are hired and become full-time, etc. From this screen you will search for resources you are interested in. Once you find a resource, double click them to open the editor. The editor is composed of multiple tabs. Each are discussed in the following help sections.
- Resource Info Tab — create a new history row for the resource or modify basic information like email address or name
- Resource Skills Tab — define areas of expertise for a resource
- Resource User Defined Fields Tab — set values for your resource UDFs
- Resource Scheduled Time Off Tab — schedule common reasons to be out of work like vacation, jury duty, or a personal day
- Resource History Tab — view and edit the history for a resource
- Resource Resumes — upload files that are relevant to a resource like credentials, resume, or photo
Resources are used in conjunction with the Users section of Projector. The user profile let's you log into Projector. The resource profile let's you be scheduled to projects. See Users & Resources Heading for more information.
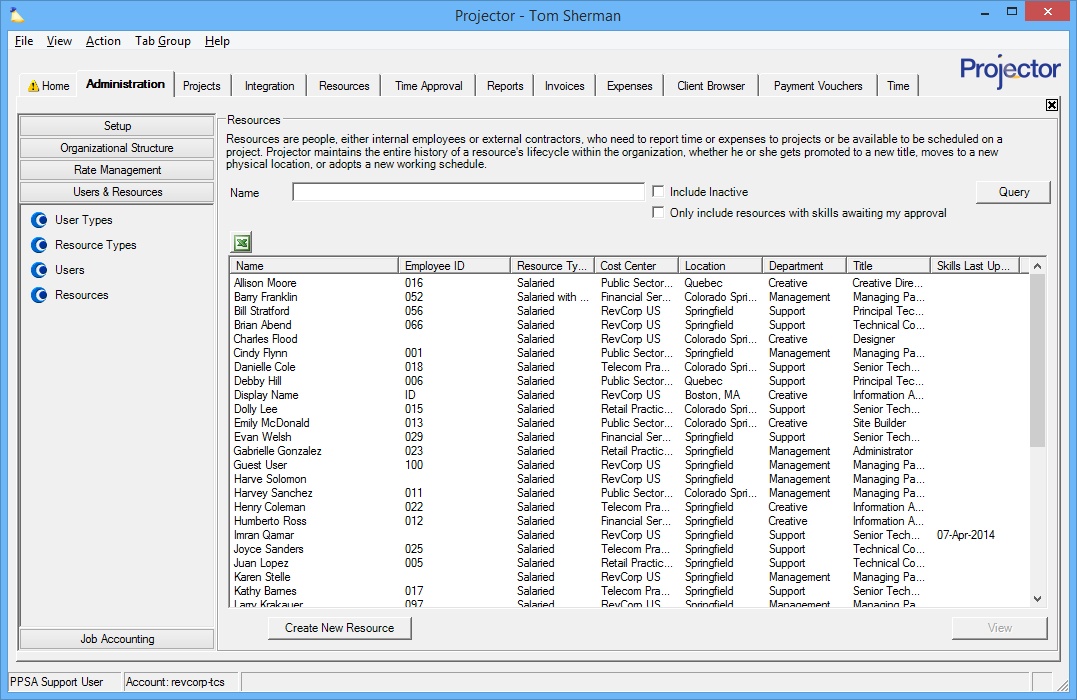
The resource browser is reached from the Administration tab | Users & Resources subsection | Resources.
Permissions and Settings
To view a resource in the list you must have the Cost Center Permission View Resources.
To add, edit, delete, or make a resource inactive you must have the Cost Center Permission Maintain Resources.
Resources and Users are automatically linked by their Display Name and Email Address. These must both be the same for each resource/user combo. If you have a resource with the same name, you should add a differentiation point like a middle initial.
When you create a new resource, we automatically create a user profile for them (always).
When you create a new user, we do not create a resource automatically. This allows you to create administrative only users who cannot enter time, enter expense, or be scheduled on projects.
What can I use the resource editor for?
Many resource-related settings and details can be managed in the resource editor including:
- Defining resource employment start and end dates
- Setting resource type like Full time, part time or contractor
- Tracking missing time
- Determining if time cards require approval and defining default time and expense approver(s)
- Defining working schedule, cost center, location and pay category
- Defining department and title which is used to determine Resource Direct Cost (RDC) or override and define a unique RDC
- Define and maintain Skills
- Maintain scheduled time off
Find a Resource
Type the resource's name in the Name field and press the Query button. To see all active resources, leave the Name field blank. To include terminated or inactive resources tick the Include Inactive box. You can use special characters to do advanced searches.
You can optionally limit your query to only resources who have pending skill updates by ticking the Only include resources with skills awaiting my approval checkbox. A resource will have pending skills if they are allowed to update skills themselves, and they have made a change via their My Profile page.
Manage Resources
The following subsections detail typical actions you take with resources, like adding or editing them.
Add a Resource
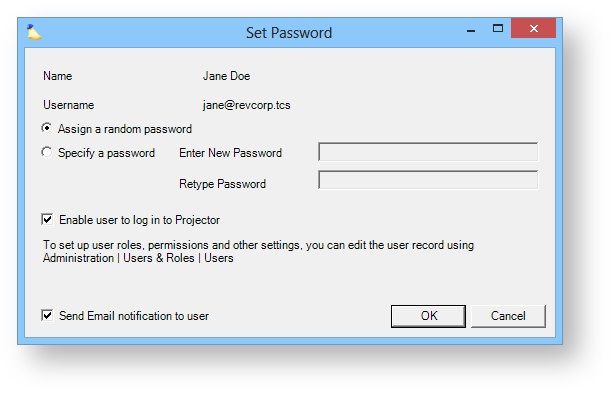
Click the Create New Resource button. This opens the resource editor window. Fill out all the required fields. When you save you will be presented with the below dialog. The settings are described in the table below.
| Setting | Description |
|---|---|
| Password | You can assign a random password or make up one of your own. If you generate a random password, make sure you tick the checkbox to email it, or nobody will ever know what it is! The password you create is temporary and will expire after two weeks if the user does not log into Projector and change it. |
| Enable user to log in to Projector | Most organizations will tick this checkbox. It tells Projector to create a matching User for this new resource. Users are allowed to log into Projector, enter their time, enter their, expenses, manage projects, etc. You may be wondering why you wouldn't want to tick this. A few organizations never allow users to log in. Rather, they just use resources to schedule people and run analytics. If your resource's start date is in the future, the created user will be inactive, but it will become active on the start date. |
| Send email notification to user | If you pick a random password, make sure you send the notification to the user or nobody will ever know what it is. |
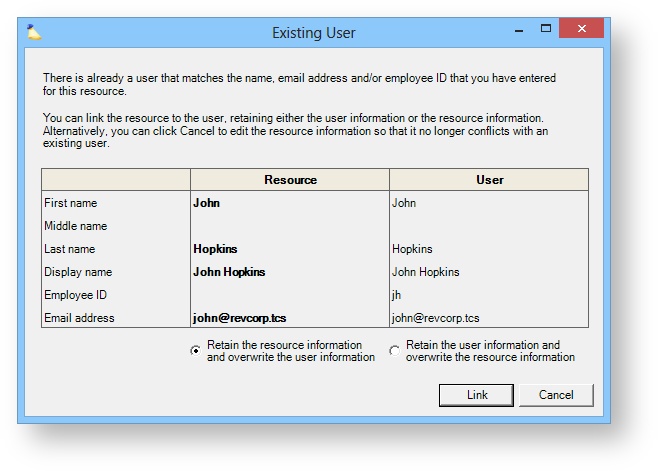
When you create a resource it automatically creates a User profile. In some rare circumstances the new resource may already have a user profile. In this case, you have to tell Projector which dataset is correct. The user profile's or the resource profile's. Tick the appropriate radio button and Link the two.
Edit a Resource
Double click on any resource to open the Resource Editor.
Delete a Resource
Right click on any resource and choose Delete Resource. If delete is grayed out then the resource has history items associated with it. In this case it can only be made inactive.
Terminate / Inactivate a Resource
Billing
If this resource is leaving the company, then please see the article How am I billed for users and resources for instructions on how to properly deactivate them. This way you won't be charged for them going forward.
You can terminate a resource by right clicking on them and choosing Terminate Resource. This inactivates both their resource and user profiles. To just inactivate their resource profile, you will need to edit them. Then on either the Info tab or the History tab tick the Inactive checkbox.
The termination date is their last day at the company. On this day they can still enter time and expenses. The following day they will be inactive and unable to do anything.
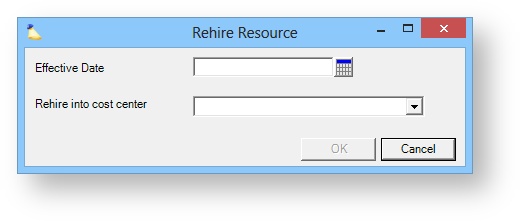
Rehire a Resource
Right click on any inactive resource and choose Rehire Resource. In the dialog that appears, specify the resource's cost center and the date they will be activated. Only dates in the future can be selected. Both the resource profile and the user profile will be made active on that date. This is the analog to the terminate resource option.