Single Sign On (SSO) for OneLogin
Some basic help in getting OneLogin configured to work with Projector's Single Sign On implementation.
Configure OneLogin
If you are using OneLogin, you can leverage our pre-built connector. Follow these steps.
- Visit the Admin Dashboard on your OneLogin account.
- Choose Apps->Add Apps, and search for "Projector". Of the options given, choose the Saml2.0 based solution.
- Click Save and the configuration tabs for the Projector custom connector are shown
- Info Tab:
- Set Display Name
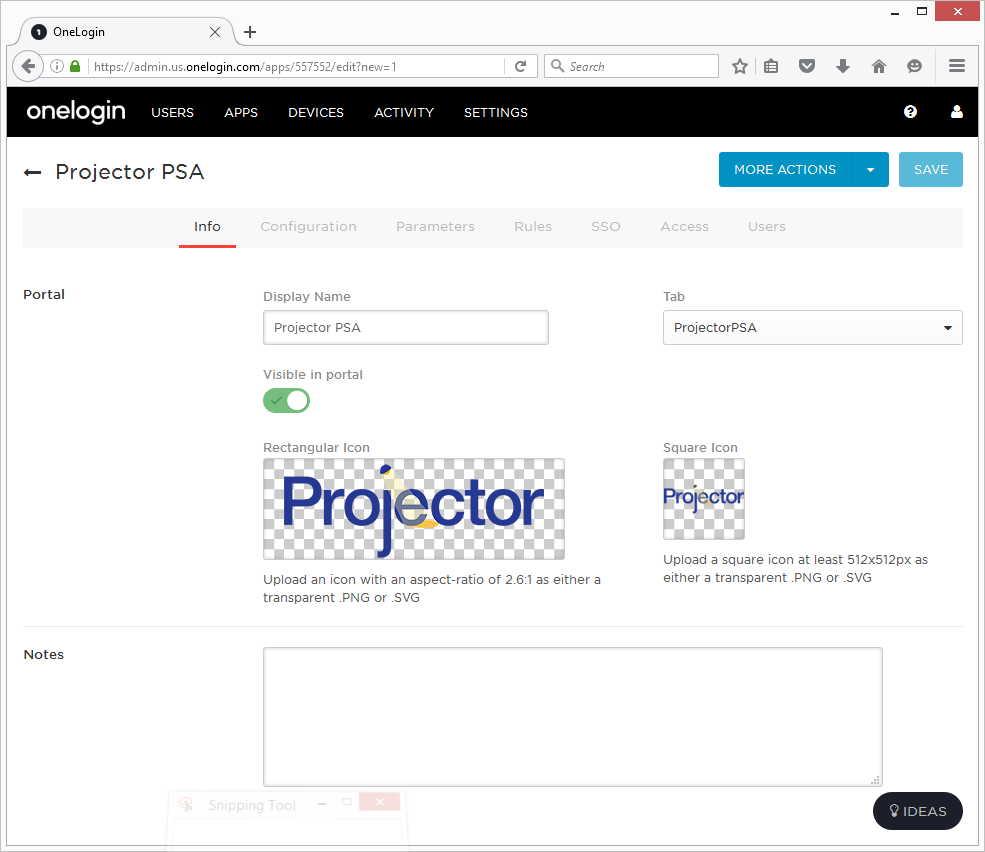
- Set Display Name
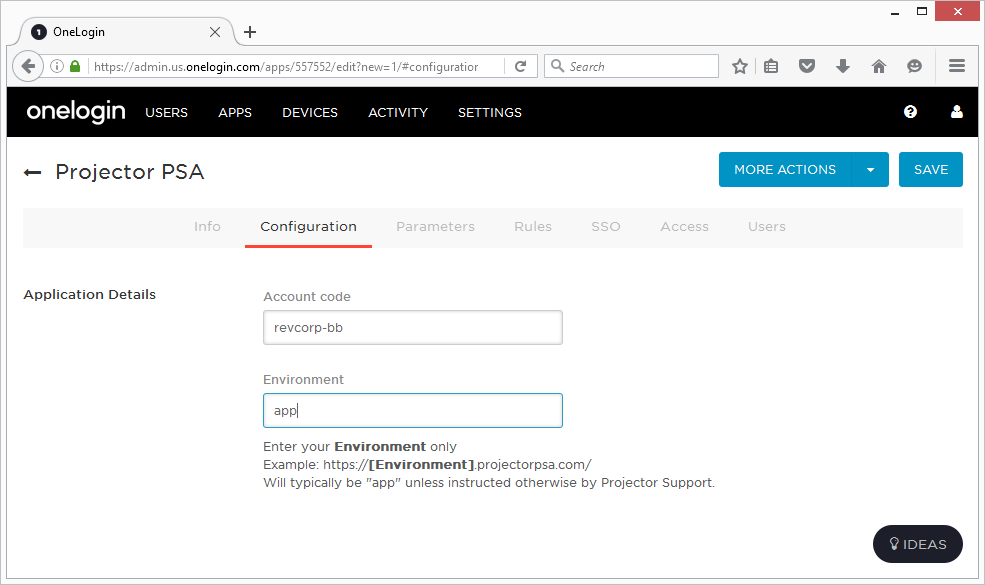
- Configuration Tab
- Enter your installation's account code. You can find this code in the lower left of any management portal session or the upper right of any Projector Web page.
- Enter your installation's environment code. This should just be "app".
- SSO Tab
- Under X.509 Certificate click View Details

- Click Download to retrieve the X.509 PEM
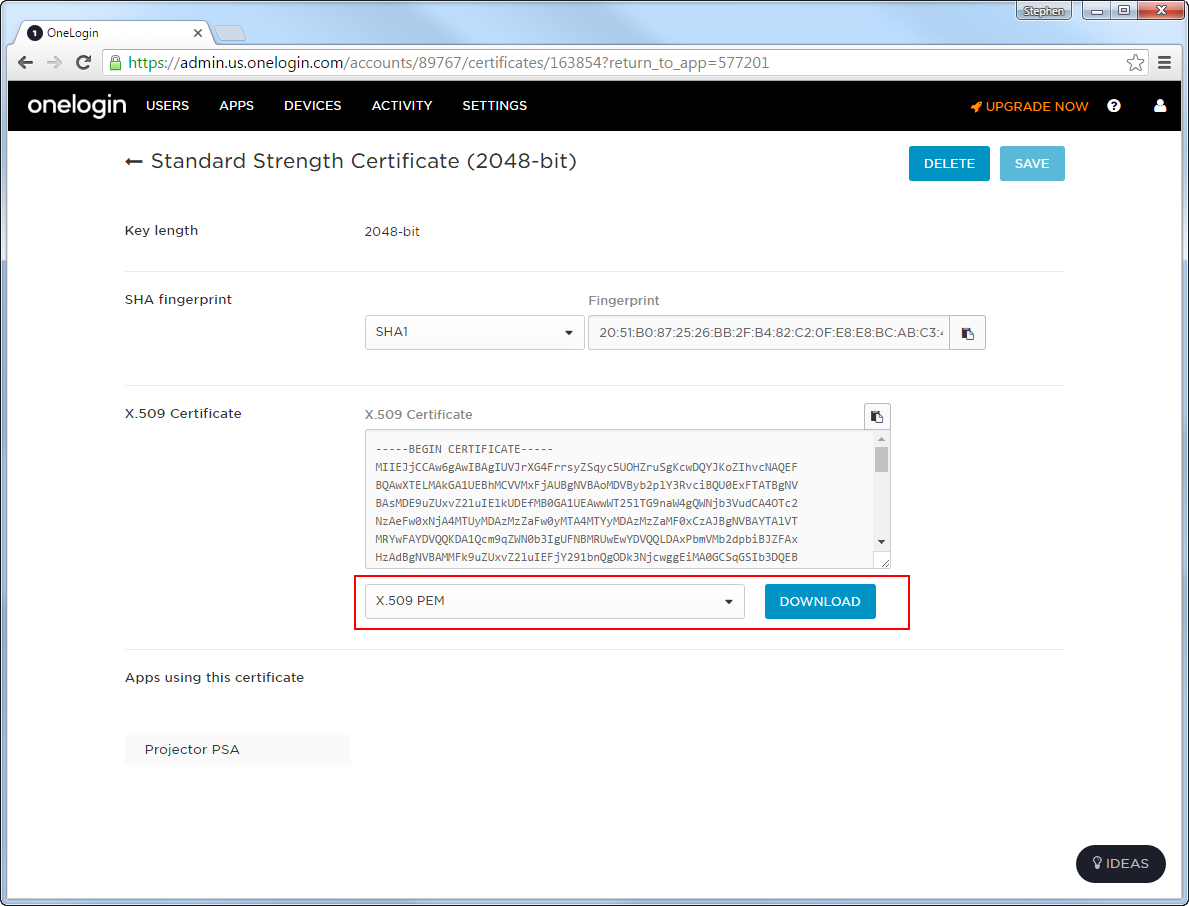
- Copy the SAML 2.0 Endpoint (HTTP)
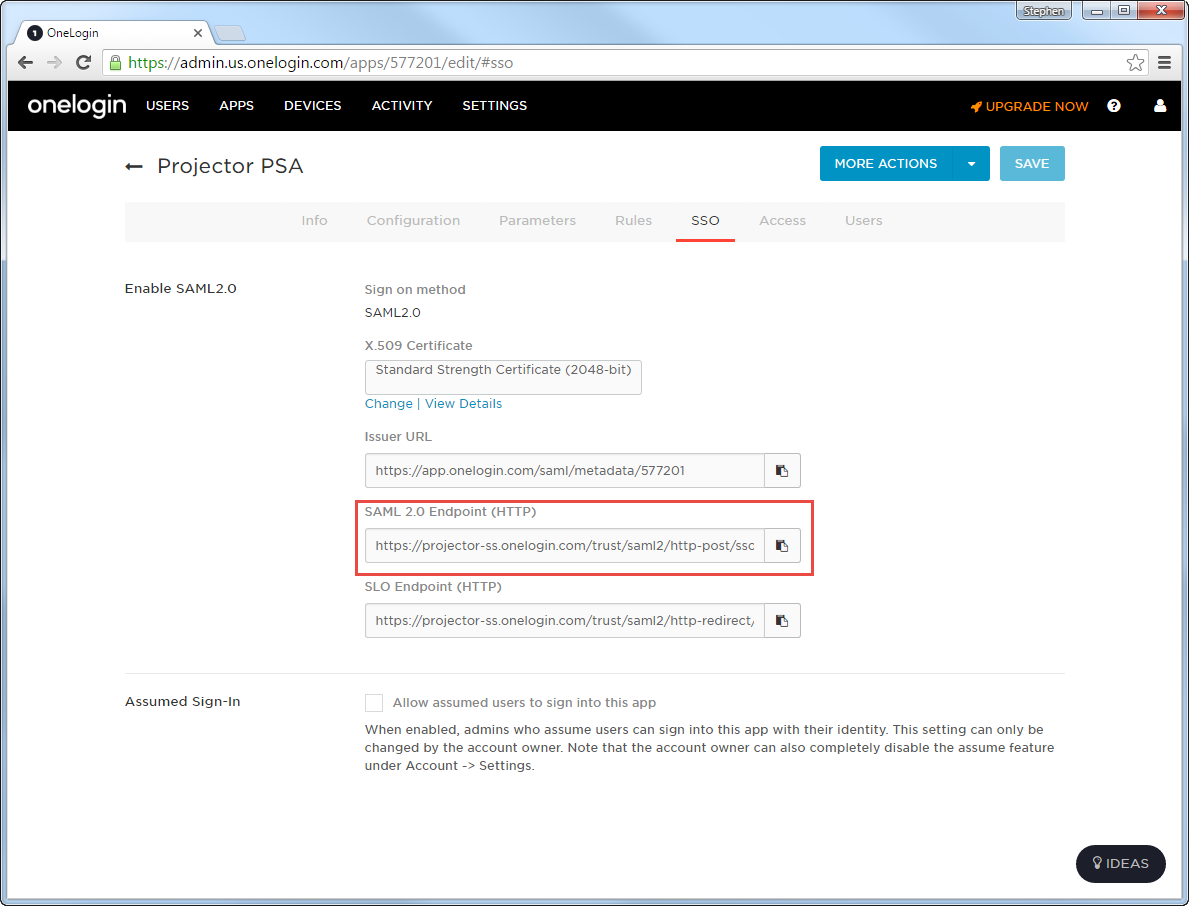
- Send the PEM file and the Endpoint URL to Projector
- Under X.509 Certificate click View Details
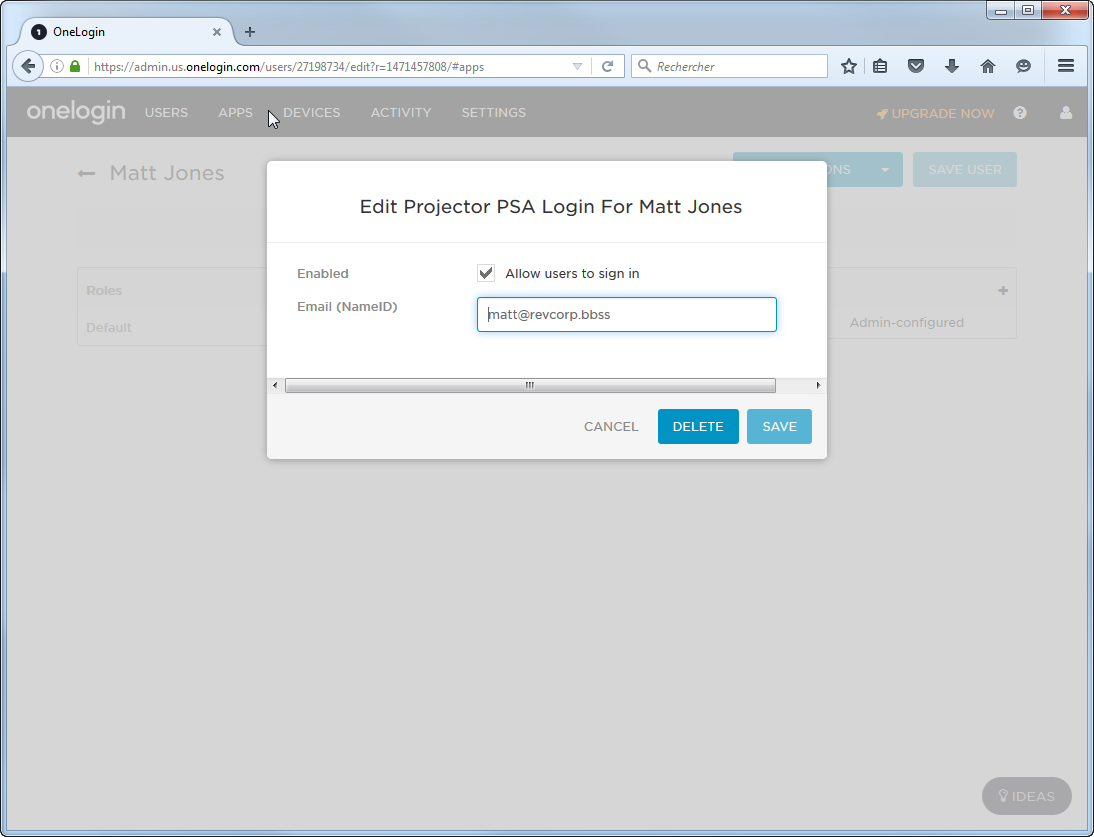
- Users Tab - This guide won't get into setting up users, but here are a couple things you might want to know about.
- For each user go to the Applications tab and add Projector as an application choice.
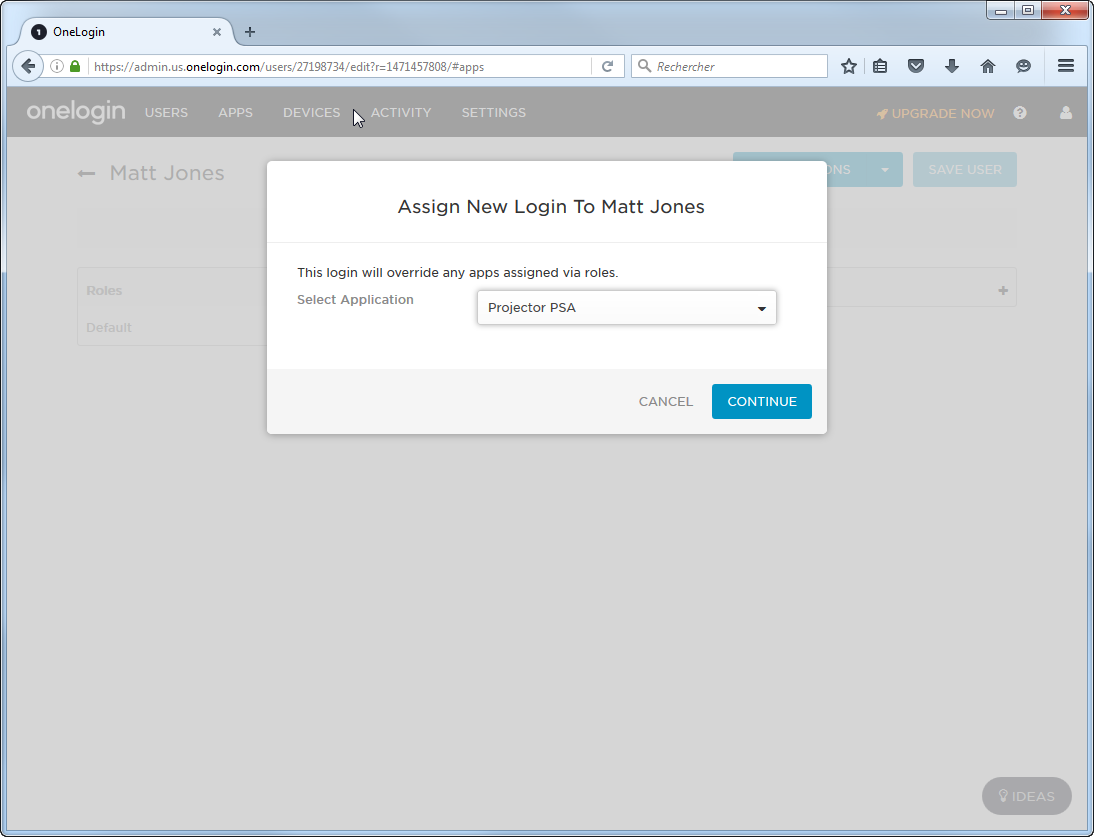
- You'll have the option of entering an alternate NameID. You would only do this if the user's Projector email address differs from their OneLogin email address. Or, if the user has Delegated Authentication enabled on their user profile and it uses something other than their OneLogin email address.